
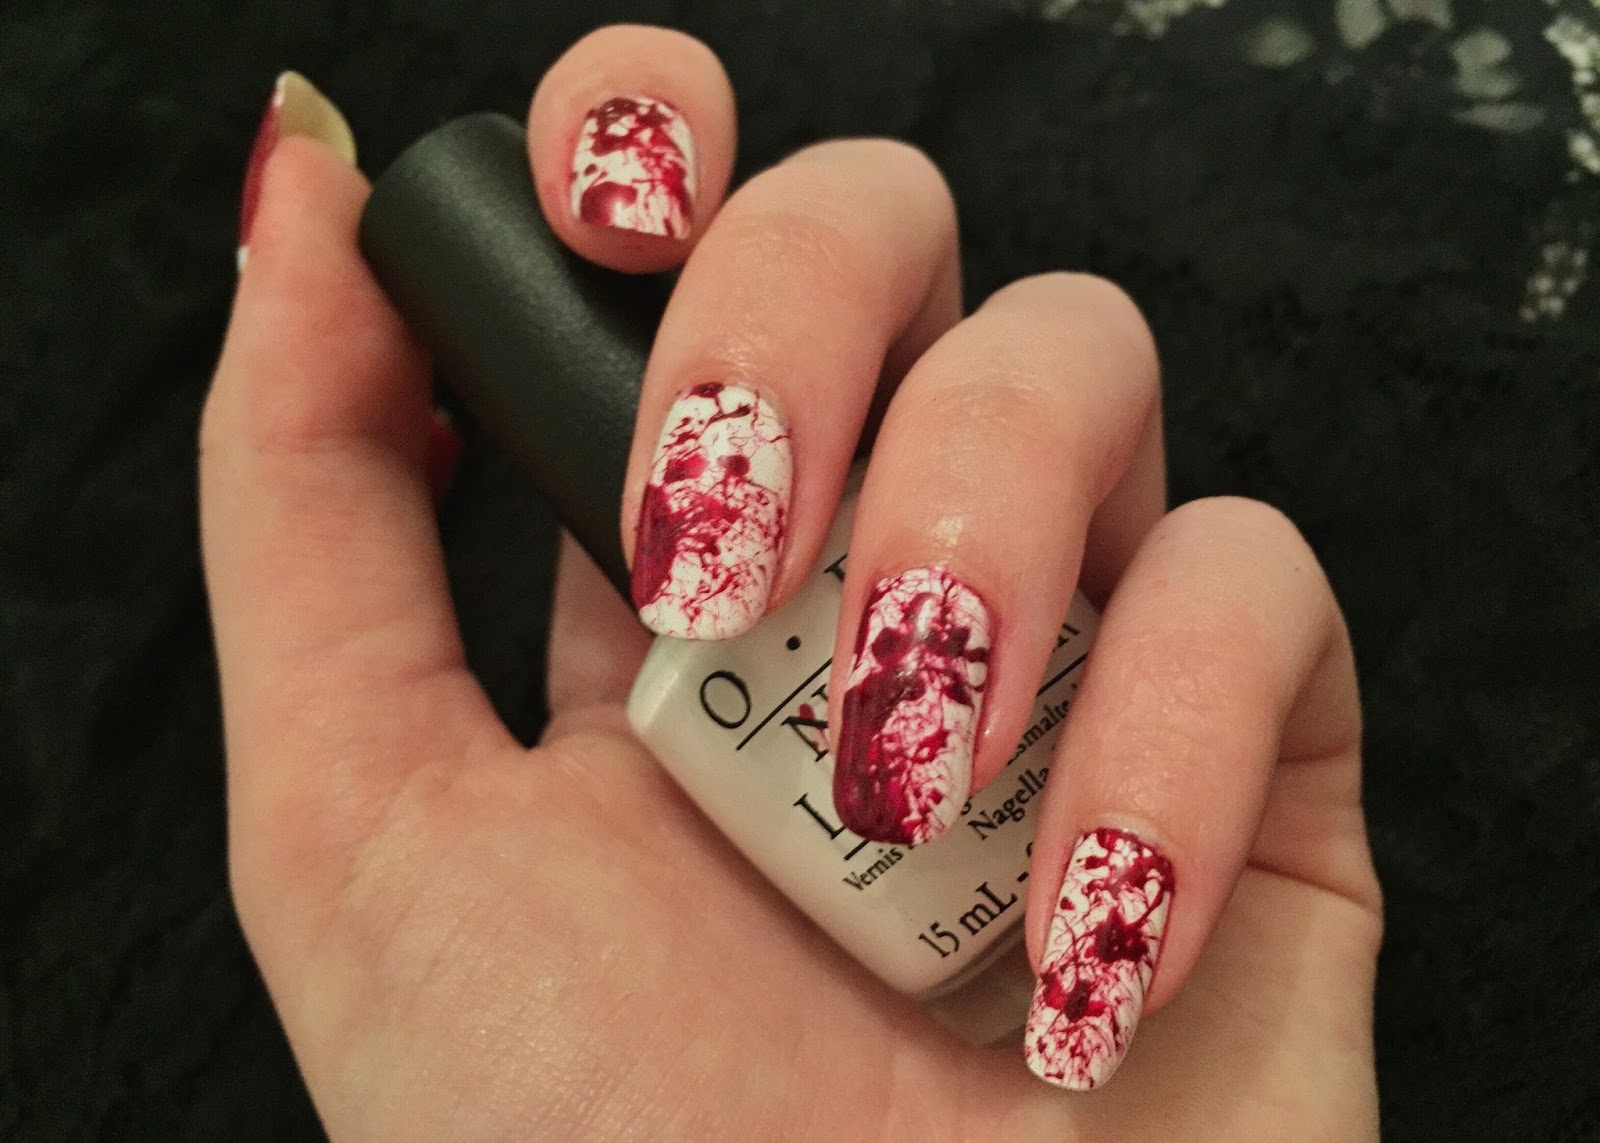
Halloween is my absolute favourite holiday, so to get into the spirit of things here's some blood splatter nails and a step-by-step guide for you to recreate the look at home:


What you'll need:
- Tape - Kitchen Roll - A straw - Paper - Base coat - White polish - Red polish - Top Coat - Nail Polish Remover - Small tipped brush (ie, lip brush)
1. As this will get quite messy, place some form of tape around all sides of all nails - I just used standard sellotape. Also, make sure to lay down some kitchen roll or newspaper!
2. Apply a base coat, wait for this to dry then paint your nails white - I used OPI in 'Alpine Snow'
3. Fold a piece of paper in half (so the polish doesn't bleed through to your table), and pour some red polish on to the paper - I used Rimmel 60 Seconds in Rapid Ruby.
4. Now this step can take a little practice and you need to work quickly - dip the end of the straw into the red polish, ensuring the end hole of the straw is covered with a layer of polish. Point the straw at your nails and blow the paint out continually, until you're happy with the design. The further the straw is from the nail, the thinner the splatter will be.
5. Once the red polish has dried, carefully remove the tape from round your fingers.
6. Using either a small brush or even a cocktail stick wrapped with cotton wool, dip this in nail polish remover and clean up any excess polish from around your cuticles.
7. Apply top coat - I swear by this Seche Vite Dry Fast Top Coat
Voila! A simple, creepy look; paint your nails then sit back and chill out watching horror movies while they dry. Hope everyone has a fabulous Halloween and if you don't dress up for it, then I'm afraid we can't be friends.